Provence Pea Coat Sew Along: Getting Started
Real Patterns. Real Clothes. Real People.
Cart 0

Provence Pea Coat Sew Along: Getting Started

adult Discount fall Prize self care self care sewing sew Sew along Sewing for Women sleeves store news tutorial women women's Women's Pattern

Welcome to the Provence Pea Coat Sew Along!!!!


I will be using the blog to document the schedule and main tips/tricks given by our fearless leaders each day, but make sure to join the EVENT to ask questions and get in on all the fun!!!  Plus, everyone who joins the event by the end of the day today (MONDAY) will be entered to will a PRIZE!!!
Also in the event you can find the code for 35% off the Provence Pea Coat, and a code for 15% off at Simply by Ti!!!

Here is the Schedule for the Week!!!

Monday
  1. Cut pattern p.12   
  2. Main Coat construction:
    1. Make toile / muslin. If you are doing this you need to make the bodice to check the coat body and sleeve insertion fit. Be reasonable about your time and accept you might just get to sew a werable muslin this week. 
    2. Pockets - welt p. 23
Tuesday
  1. Main Coat construction continued
    1. Sleeves p. 33
    2. Collar p. 37
Wednesday
  1. Full waist band or Tie belt p. 41
Thursday
  1. Full lining p. 42 
  2. Unlined coat facings p. 47
    1. Hemming - unlined coat p.52
Friday
  1. Buttons: p56
  2. Hood. p.58
Saturday- Friday Nov 10th
  1. Catch up and SHOW OFF!!!!

Monday
Before you start:

  1. Gather your supplies. 
  2. Print pattern, tape pattern, wash fabric - p.11
  3. Are you going to line your coat? If not you’ll need to finish the seams or bind them, (insert link to binding methods or not?)
  4. Pattern Hacks:
  5. Zips (where and what supplies are needed)
  6. Choose your options: 
    1. waistband 
    2. back band 
    3. belt   
    4. cuff band

Getting Started:

  1. Main coat construction up to the end of p.23.
  2. Make toile / muslin. If you are doing this you need to make the bodice to check the coat body and sleeve insertion fit. Be reasonable about your time and accept you might just get to sew a werable muslin this week. 
    1. Pockets - welt p. 23


Cutting tips for PLAID!!! (tips from Roberta)

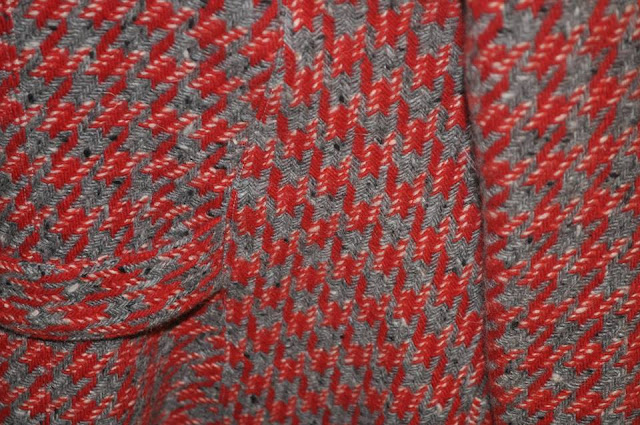
If you've chosen a plaid, you might like to have some fun by cutting your side panels on the bias. It adds some interest to your coat and a plaid matching challenge for you. There are two important things to remember.
1. When you're matching plaids, checks or stripes, match them on the seam line, not on the cutting line. They need to match where you're going to be sewing. If you're new to matching, try tracing a small portion of the plaid onto the pattern pieces and then line them up on the fabric to cut.
2. When you're sewing on the bias, if two bias cut pieces are to be sewn together, you need to cut them going in opposite directions so your garment doesn't twist. The result is you get nice chevrons.  You can also cut your collar, the back yoke, sleeve tabs, and back belt on the bias if you choose. Be careful, though, because it does take more fabric.
Making a Rain Coat: (tips from Jackie)
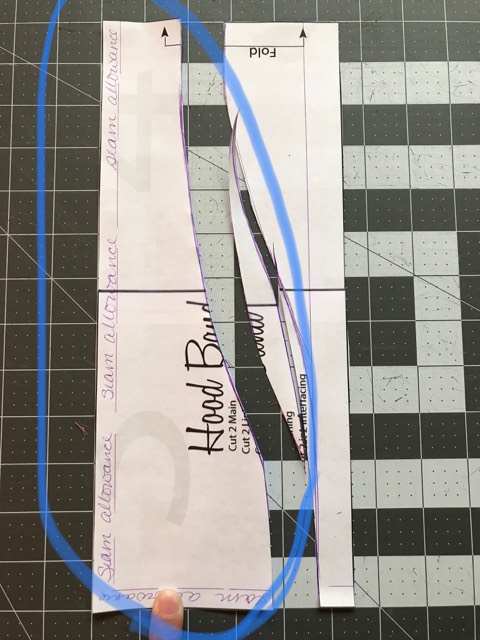
If you are making a hooded rain coat, you may want your collar to be attached directly into your coat as opposed to attached by buttons to the collar.  Jackie has come up with an ingenious hack to the collar that will allow you to do just this!!!
Simply adjust your collar piece as pictured, and then you will sew your hood into your collar.  We'll have more abut how specifically to do that later in the week, but for now, just adjust your collar piece!

- I made the Center back 1 3/4” tall then used a French curve to make a gradual curve to the edge, which was 3 3/4 for the last 3”


Older Post Newer Post