
___________________________________
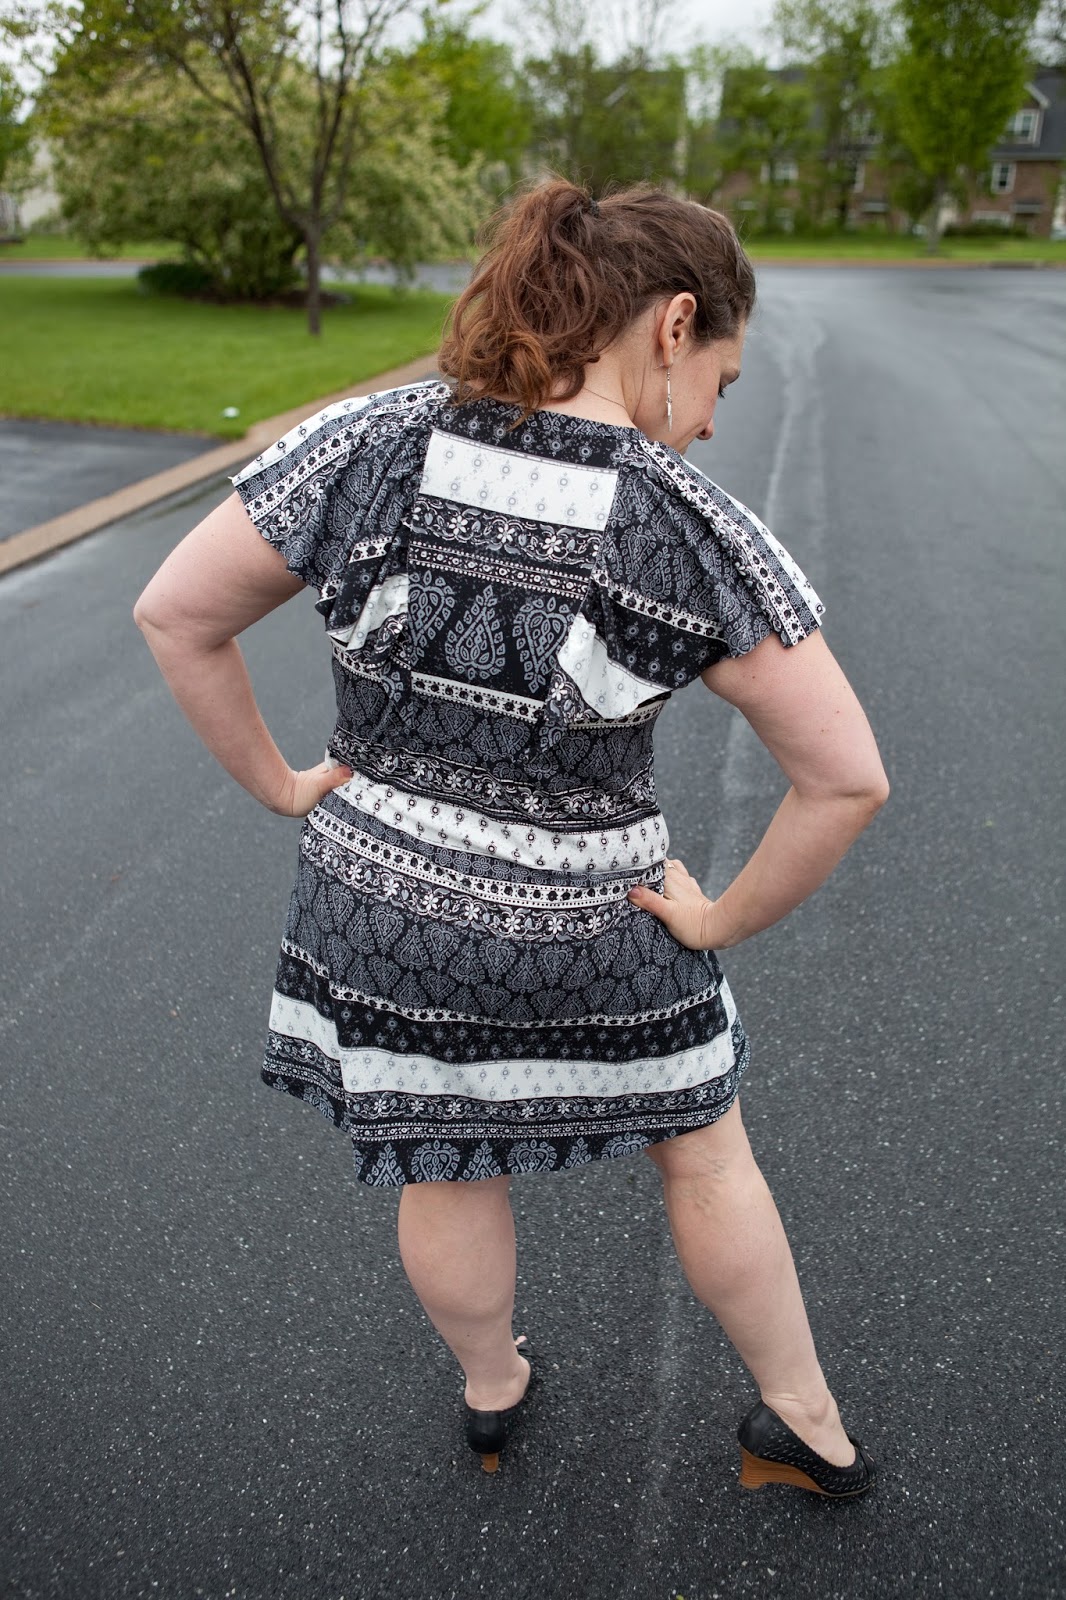
Are you looking at this Amuse and thinking, hmmmm- something is different... Ha, well you are right. This Amuse is a hack inspired by this image I found online:

I really fell in love with the flutter sleeve, and wanted to work that feature into the Amuse. I instantly thought - oh that will be such a fun, quick and easy tutorial. Well, it is fun!!! I'm not so sure about the quick and easy though, HA! I'm going to tell you what I did, but I've also pretty much decided that this just needs to be its own all new pattern based on the inspiration ;o)
If you want to try this out, here is what you need to do:
- Cut your front as normal.
- Cut your back as normal.
- Using the front yoke as a template, you are going tto trace the yoke on the back pattern peice. You need to make sure that you remove seam allowance from the yoke piece before tracing it. You also want to make sure that you line up the bottom of the yoke piece even with where the yoke cut out is on the front piece. The front piece is shorter fromt he neck to the bottom of the yoke, so you will need to extend your yoke side lines to meet the neck line of the back.
- Cut out the traced section for your back yoke,
- Cut your front yoke
- Cut a back yoke using the piece you cut off of the back, make sure to add seam allowance to the sides and bottom.
- Take your short raglan sleeve. You are going to draw a curved line to turn the sleeve into a tank top, so you just need the shoulder section... this is the tricky part. Measure from your neck to your shoulder. Use that measurement to measure from the neckline of the sleeve out to where you want the end of the sleeve to be. Draw a curve from the edge of the armscye to that point - this is your new sleeve piece, cut two mirror image. Cut two arm bands from the measurements included in the Trendy Tank (free pattern).
- For the flutter sleeve, you want to measure the length of the side of your 2 yokes (front and back), add to that the length of the neckline of the sleeve. Multiply by 1.5 to get the excess to gather. This is the length that you want the interior curve of your flutter sleeve to be. A flutter sleeve is essentially a crescent shape. You can make the width whatever you want to get the look you like, I went wide for the flutter sleeve look, you could go narrower for more of a ruffle look. Simply measure from your neck to the point on your shoulder or arm you want to hit.
- Construction isn't hard, but is a bit out of order:
- Start by gathering your front.
- Sew your sleeves to the front and back bodices.
- Gather your flutter sleeves.
- Pin in place along the edge of the yoke opening front front to back and along the neckline of the sleeve. Adjust the gathers to your taste.
- Baste in place.
- Attach your yoke as directed in the pattern - only use one front yoke and 1 back yoke.
- Continue with the side seam construction.
- Try on and see if you want to adjust your sleeve or the fit.
- Attach your arm bands.
- Voila!
HAHAAH - seeeeeeee, not impossible, but not super simple either ;o)
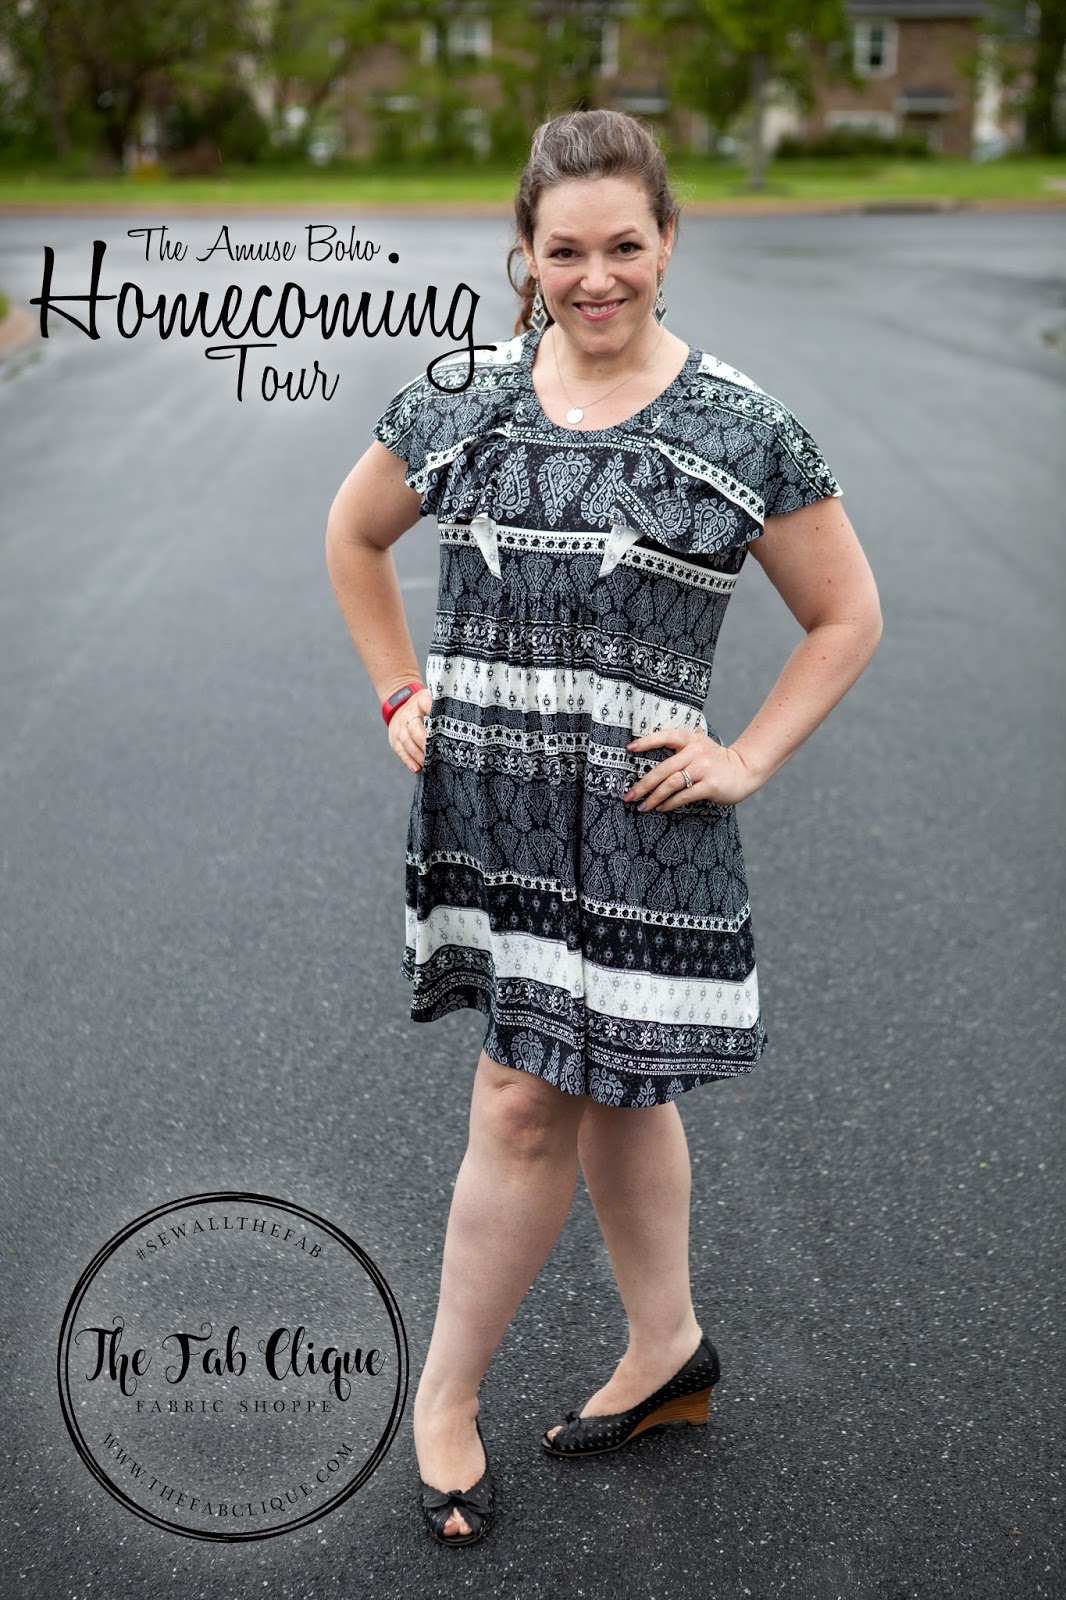
It is a super cute final result though! Thanks again to The Fab Clique Fabric Shop for this gorgeous fabric, and don't forget to check out the Amuse Bundle of 4 yards for $24!!!