
Welcome to the Poolside Blog Tour!!!!
In my side of the world, it is summer, and in my family 'summer' means POOL! I have three kids on the swim team this year, and that means that I do laundry ever day...I mean, that means I spend a lot of time sitting by the side of the pool chatting with moms, getting a freckle tan (cause yeah, I don't tan), and cheering on my fish until I loose my voice. So you'll see some swim suits on this blog tour, but you are also going to see lots of fun outfits that are perfect for hanging out and staying dry by the pool, or on a back porch, or chasing kids at the park - but for me, these outfits start their day poolside.
Can we give a huge shout out to Boho Fabrics who are sponsoring this blog tour with an awesome giveaway. Make sure to enter to win the Poolside GRAND PRIZE that includes a $50 Gift Card from Boho Fabrics and 2 patterns of choice from WWD!
---------------------------------
Today we have three fun posts to kick off the week:
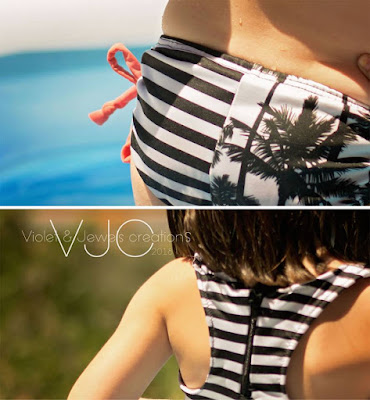
Rachel of Violets and Jewels with a killer Fly Girl Racing Suit Hack.
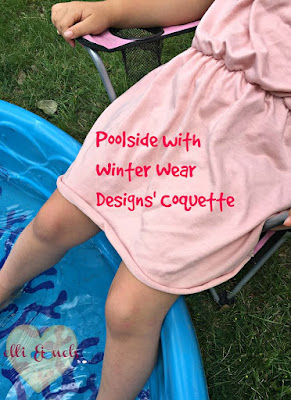
Merlie of Ellie and Nells with a Coquette Swim Coverup.
And the ever amazing Jackie Burney has her Reversible Trendsetter Tankini Hack below!
Can we give a huge shout out to Boho Fabrics who are sponsoring this blog tour with an awesome giveaway. Make sure to enter to win the Poolside GRAND PRIZE that includes a $50 Gift Card from Boho Fabrics and 2 patterns of choice from WWD!
---------------------------------
Today we have three fun posts to kick off the week:
Rachel of Violets and Jewels with a killer Fly Girl Racing Suit Hack.
Merlie of Ellie and Nells with a Coquette Swim Coverup.
And the ever amazing Jackie Burney has her Reversible Trendsetter Tankini Hack below!
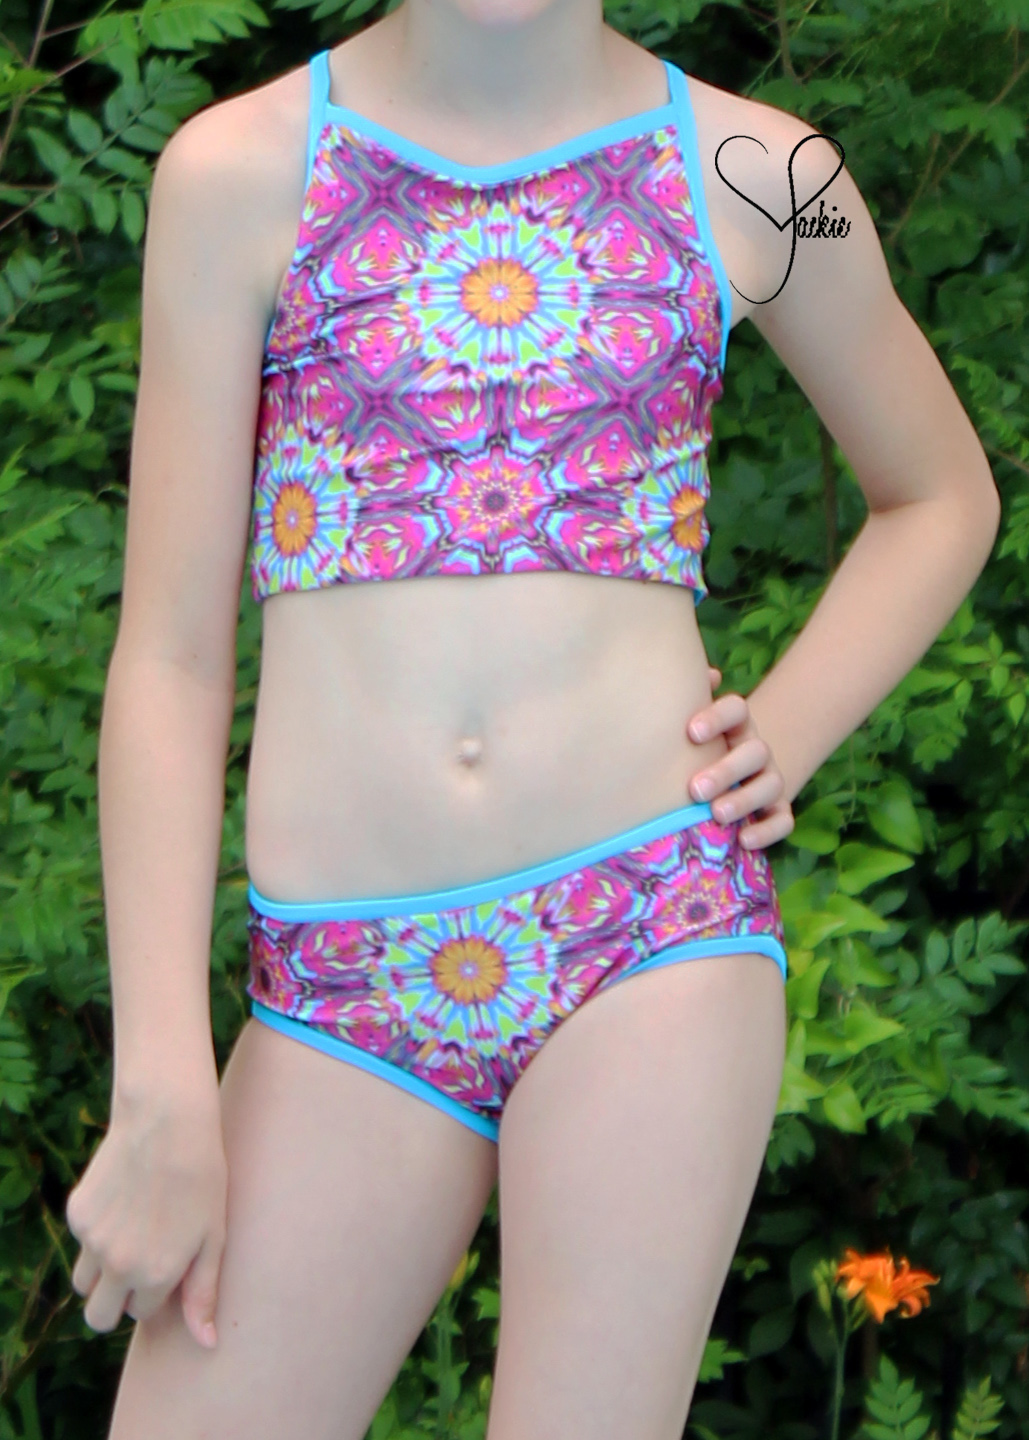
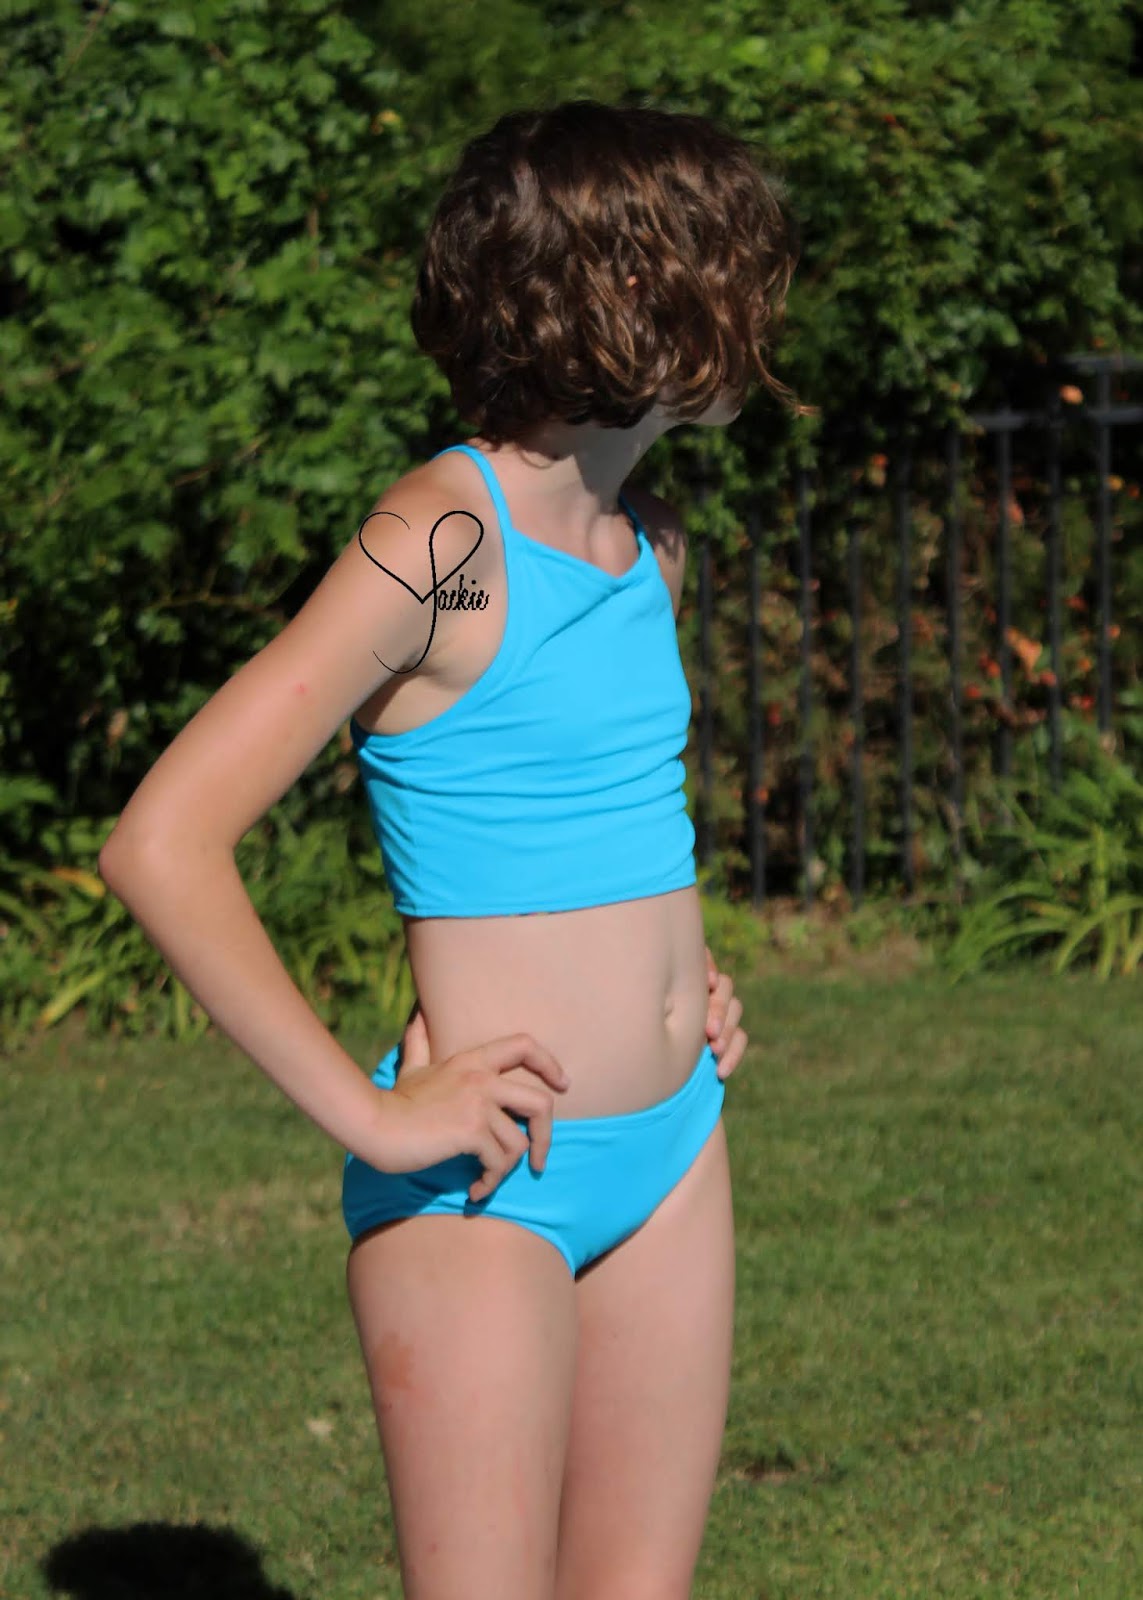
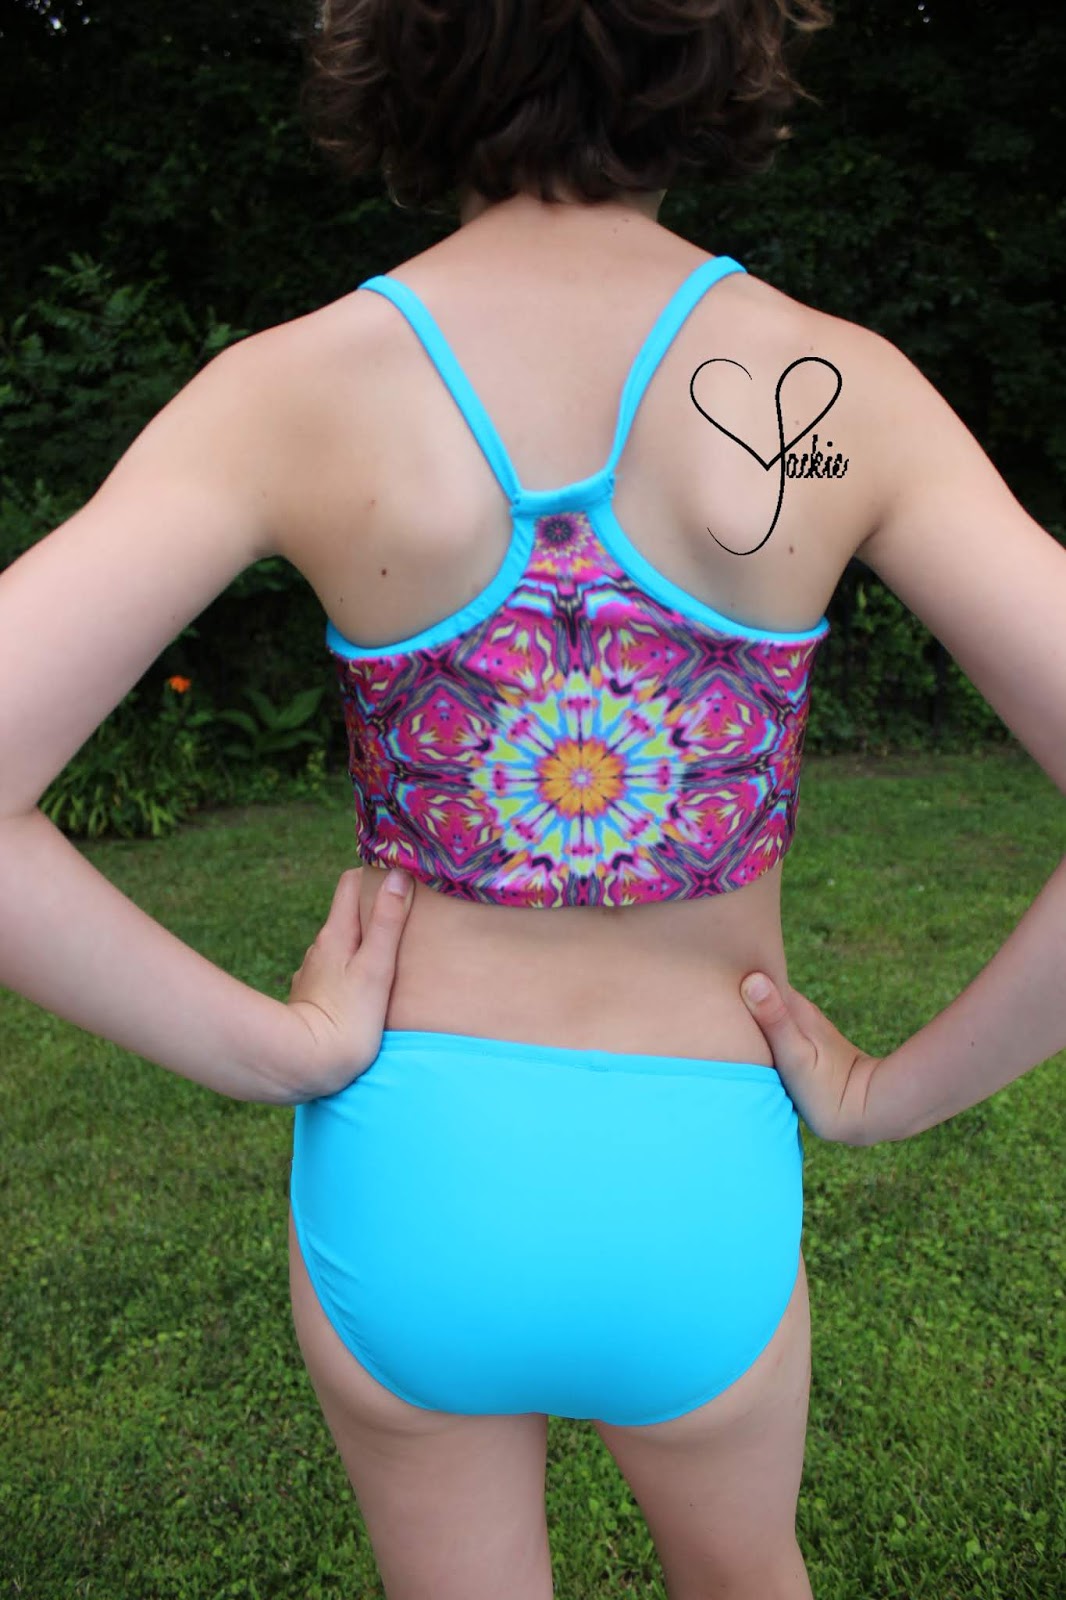
Reversible Tankini:
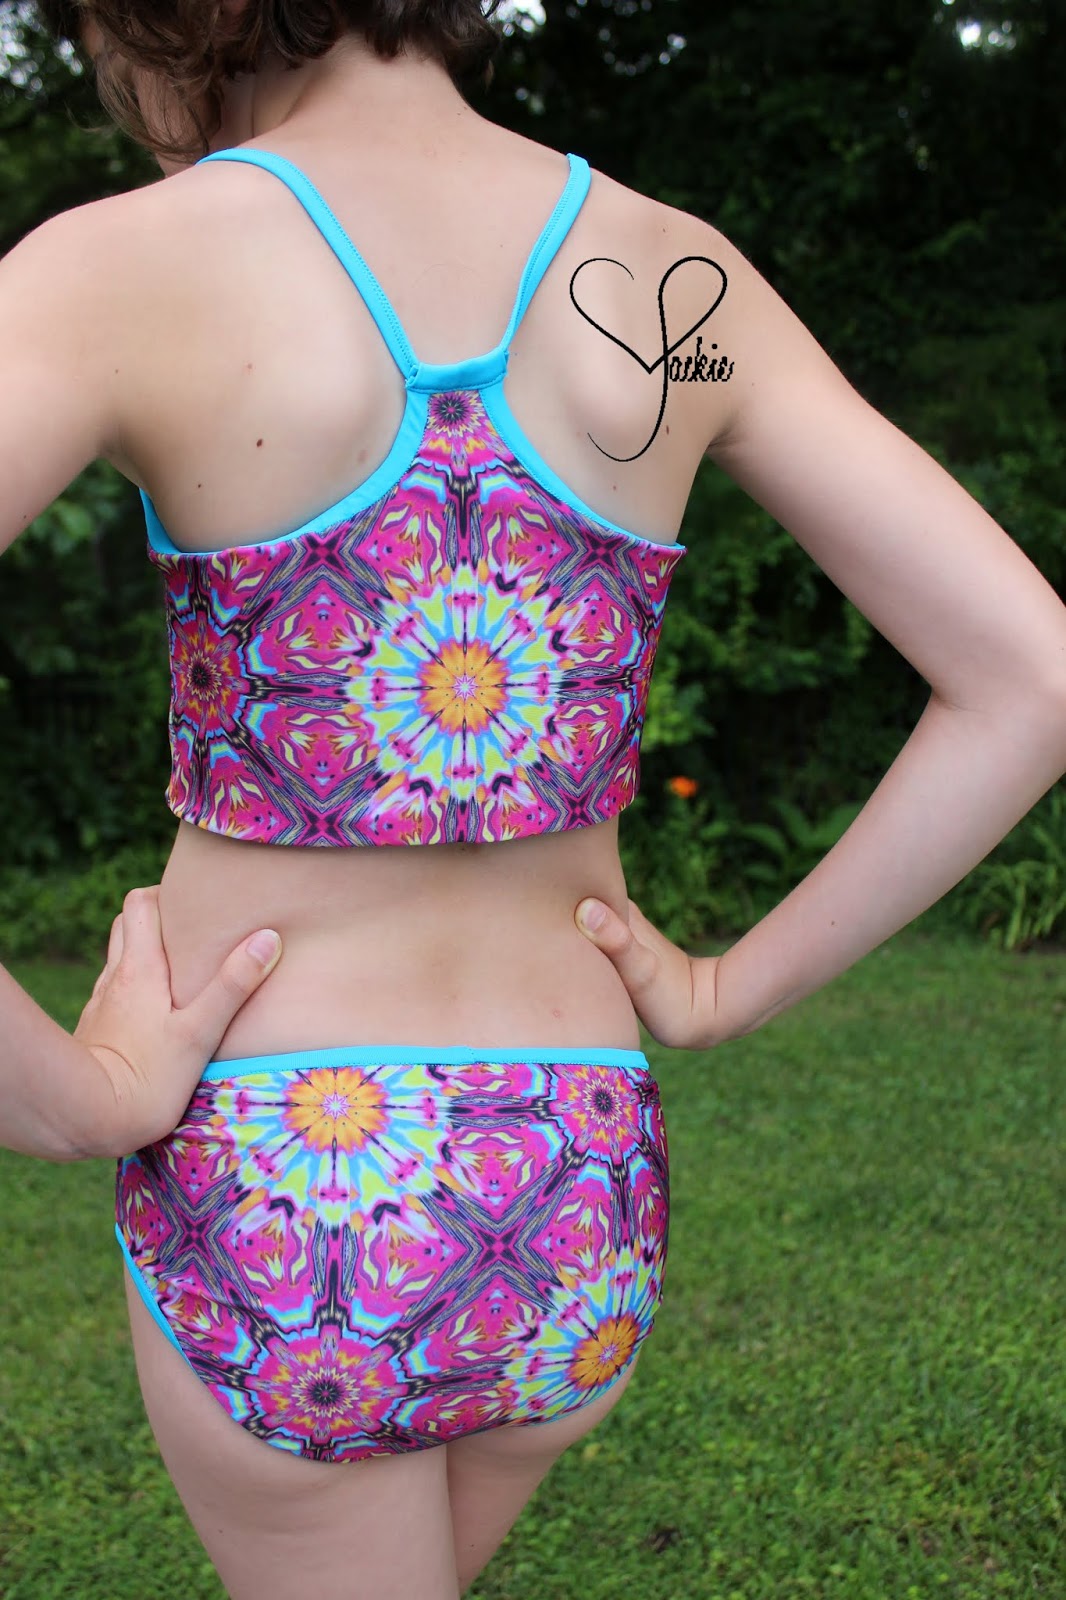
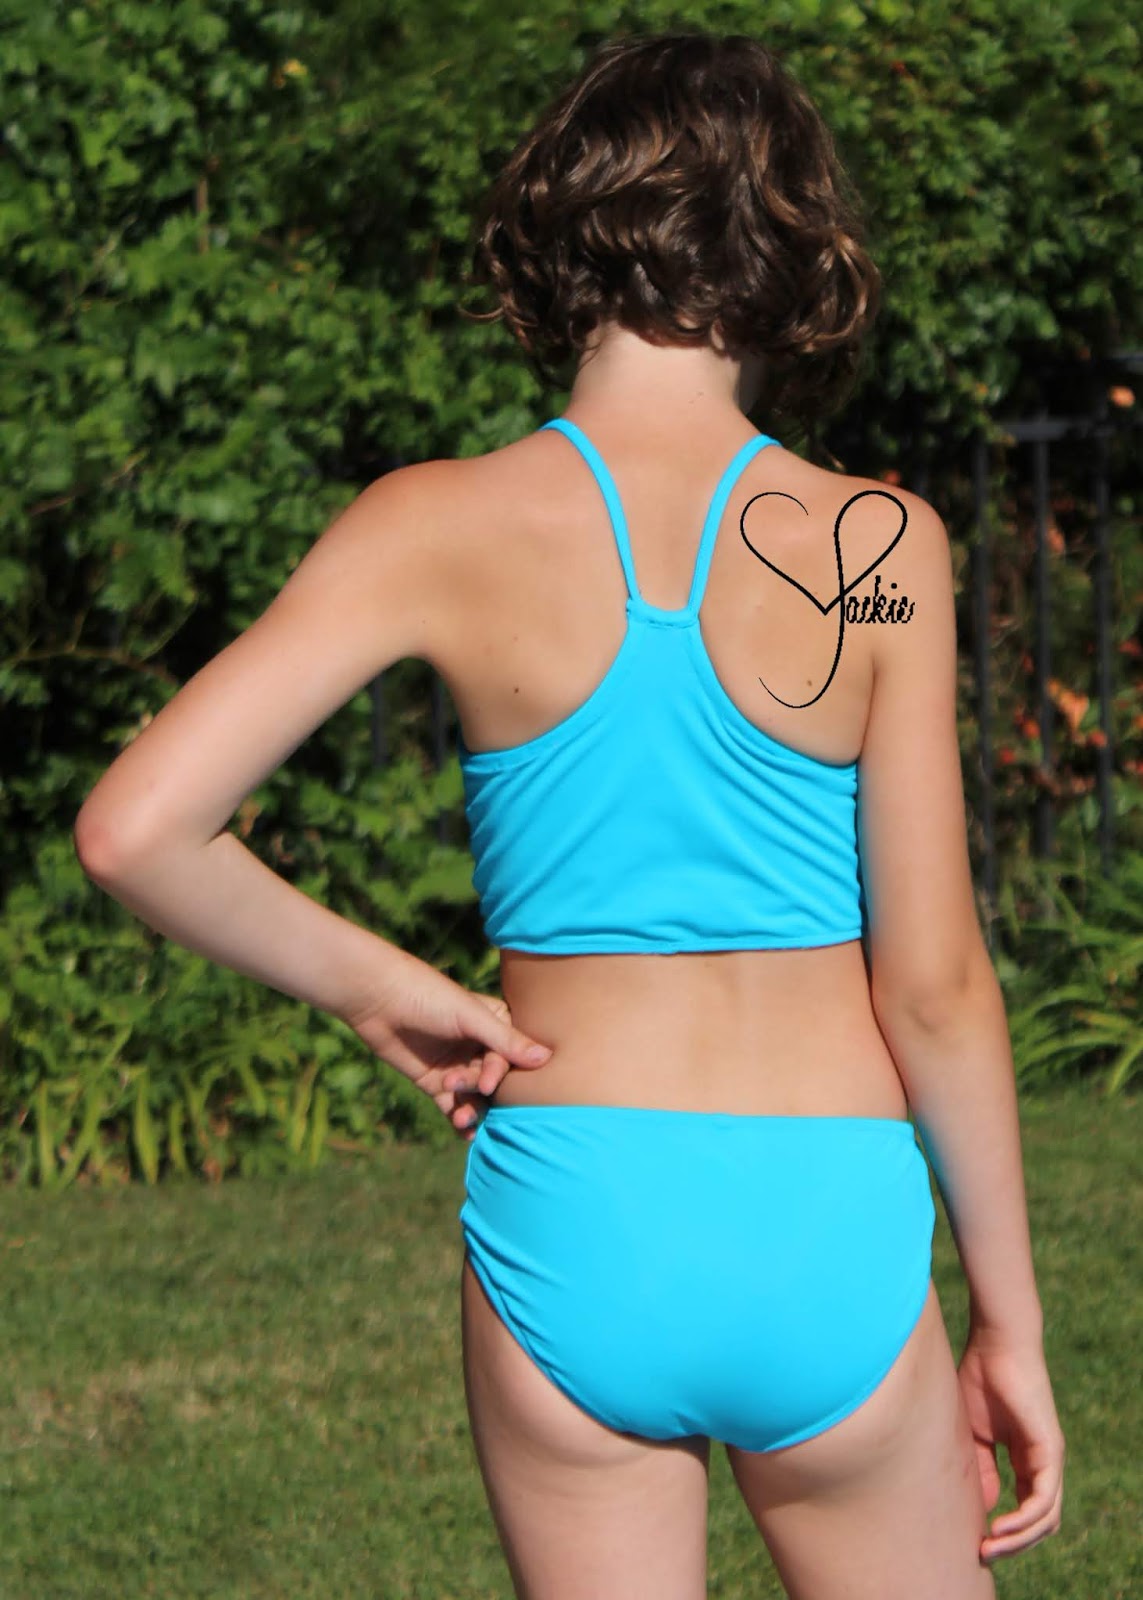
Hey y’all, it’s Jackie. I’m one of Suzanne’s assistants here at Winter Wear Designs. One of the benefits of being an assistant is that Suzanne trusts me when I tell her I want to play with a pattern during testing and deviate from the instructions. Nine times out of ten, those deviations are a success and turn into a fun hack. That’s what brings me by the WWD blog today. I made a REVERSIBLE Trendsetter Tankini, in the Y-back version, and I wanted to help you to do it too! It’s way easier than you might think!
I didn’t take in-process pics because I didn’t know how well it would turn out, so please forgive me. I’ll try to apply my Language Arts teacher skills to help you visualize.
Cutting:
- When cutting your pieces, use swimsuit fabric for the main and a different, complimentary swimsuit fabric for the lining. I chose a print for the main fabric and a solid for the lining.
- When you cut the binding pieces, you can use the same as the lining fabric, or you can choose a third swim fabric.
- You’ll cut everything as directed in the instructions, plus two additional binding pieces for the leg holes. Cut those the same length as the elastic and the width of the the other bindings.
- You’ll also need to save some binding scraps to attach the straps at the back in a tidy way.
- When making a reversible suit, it is important that you use matching thread colors so that they won’t show.
- A pair of applique/duckbill scissors is also super helpful, but not required.
Construction:
Since the instructions begin with constructing the bottoms, we’ll begin there too. Sew your main pieces together along the side seams and crotch seam. Set them aside, and repeat the process for the lining fabric. Sew your waist and leg binding pieces into loops, and mark each loop into quarters. Tuck the lining bottoms inside the main bottoms, wrong sides together so that the seams are fully enclosed. Align all the raw edges, matching your seams. Mark the waist and leg holes into quarters. Pin the first leg hole binding to its respective leghole, with the right side of the binding piece facing the right side of the main bottoms, matching your quarter marks, and sew. You will need to stretch the binding piece some. Do this for each opening.
*I find it is easier to sew the seam and binding before sewing the elastic on so that I can be sure all layers are secured.*
Sew your waist and leg hole elastics into loops. Mark them into quarters. Pin them to the bottoms at the quarter marks, aligning the edge of the leg holes with the edge of the elastics, and sew through all layers. Wrap your binding pieces tightly around the elastic to the inside/lining side. Take your time with this step because a bunchy binding will take away from the reversibility of the suit. Stitch in the ditch to secure your binding in place. There will be extra binding. Trim it away slowly and carefully. The beauty of swim fabric is that it does not fray, so you can cut the excess away and have a beautiful clean edge. Once you’ve done this for the three openings, your bottoms are completed.
For the top, we won’t stray far from the instructions. Sew your main pieces together at the side seams, right sides together. Set them aside and repeat the process for the lining pieces.
*This is different, you are sewing the 'hem' first*
Tuck the lining bodice inside the main bodice, right sides together, aligning all raw edges and seams. Sew the bottom edge, then mark it into quarters. Sew your elastic into a loop as directed, and mark it into quarters as well. Match the quarter markings, and sew your elastic into place. Turn the bodice right side out. You can zig-zag stitch the bottom in place so it doesn’t shift.
Follow the directions for the neck binding and straps as instructed. When you reach the point where you attach the straps to the back, you’ll need your saved scrap of binding. Sew your binding piece to the bodice, right sides together with the main side. There should be a little bit of excess binding on both sides to keep raw edges from showing. Attach your straps to the seam lining side of the allowance so that they fit the wearer well and stitch in place. Wrap the binding around the seam allowance and strap ends, stitch it in place, and trim any excess.
And now you have a fully reversible tankini. By binding all the openings, with the exception of the bodice hem, all seams and elastics are fully enclosed. The special girl can wear the suit in a variety of ways, mixing and matching to her heart’s content. I hope she loves it as much as my daughter loves her suit!

Pull up a lounge chair and a cold drink, and don't miss a single stop on the Poolside Blog Tour:
7/16
Jackie Burney for Winter Wear Designs
Meriel of Elli and Nels
Rachel of Violets and Jewels
7/17
Laura of Custom Made By Laura
Althea of So Today I Did A Thing
7/18
Michelle of Little Heart Threads
Larissa of Connected By a Thread
Lisa of Mabey She Made It
7/19
Alyssa of The Sewing Goatherd
Diane of Sewing With D
Lisa for Winter Wear Designs
7/20
Livia of Liviality
Patricia of Sew Far North