
Today's tutorial is sweet and simple, but ads big impact to your project. We're talking trim - lace trim to be exact. There are a gazillion different trims out there which can add completely different looks to your project. I love the look of lace becasue it is such a classic look and can easily go vintage, boho, or elegant depending on the type of lace you choose and the fabric you pair it with.
Here are some fun lace resources:
Lace Heaven
Lace Place
Trim Fabric
(If you know of other awesome lace&trim resources, post a link in the comments!)
Ok, so adding lace to your Magnolia is quite simple, but there are a few tips and tricks that I have so that it will come out perfectly the first time.
- Lay your lace along the bottom of each of your pattern pieces. When you cut, make sure to follow the angle of the side of the pattern. If you cut your lace straight down, it will change the flow and drape of the bottom of your finished garment.
- Sew your Magnolia as stated up to the hem.
- Sew your two pieces of lace together at the side seams.
- Match the straight edge of your lace with the raw edge of your hem, making sure the side seams match. Serge or baste together.
- Fold up your hem to the wrong side 1/2 inch and pin in place.
- Stitch your hem in place with a long straight stitch, twin needle, or zig zag stitch.
- Press well (always test your iron on a scrap of lace prior to pressing to make sure it wont scorch or melt).
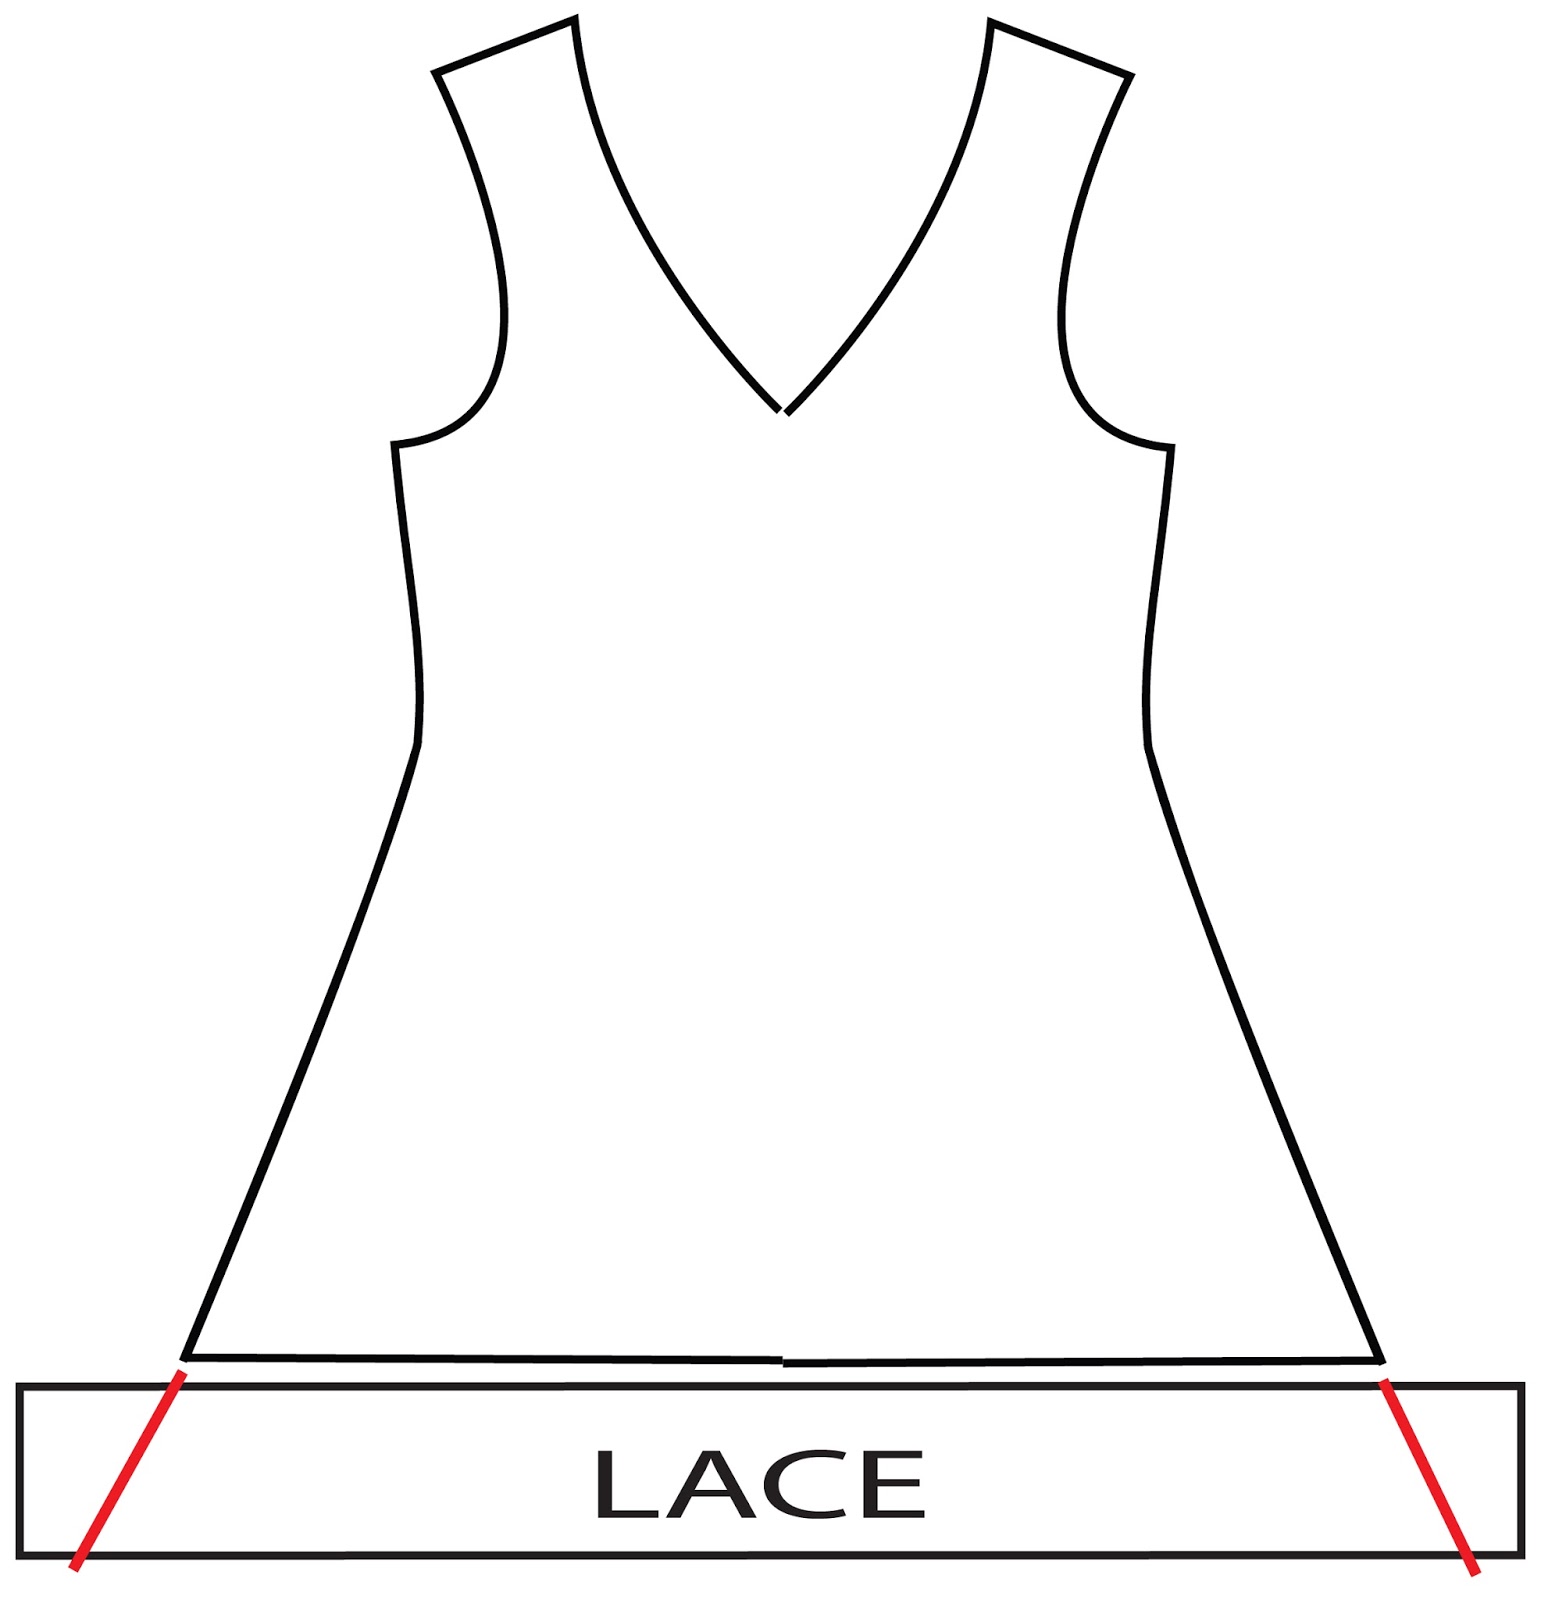 |
| step 1 |
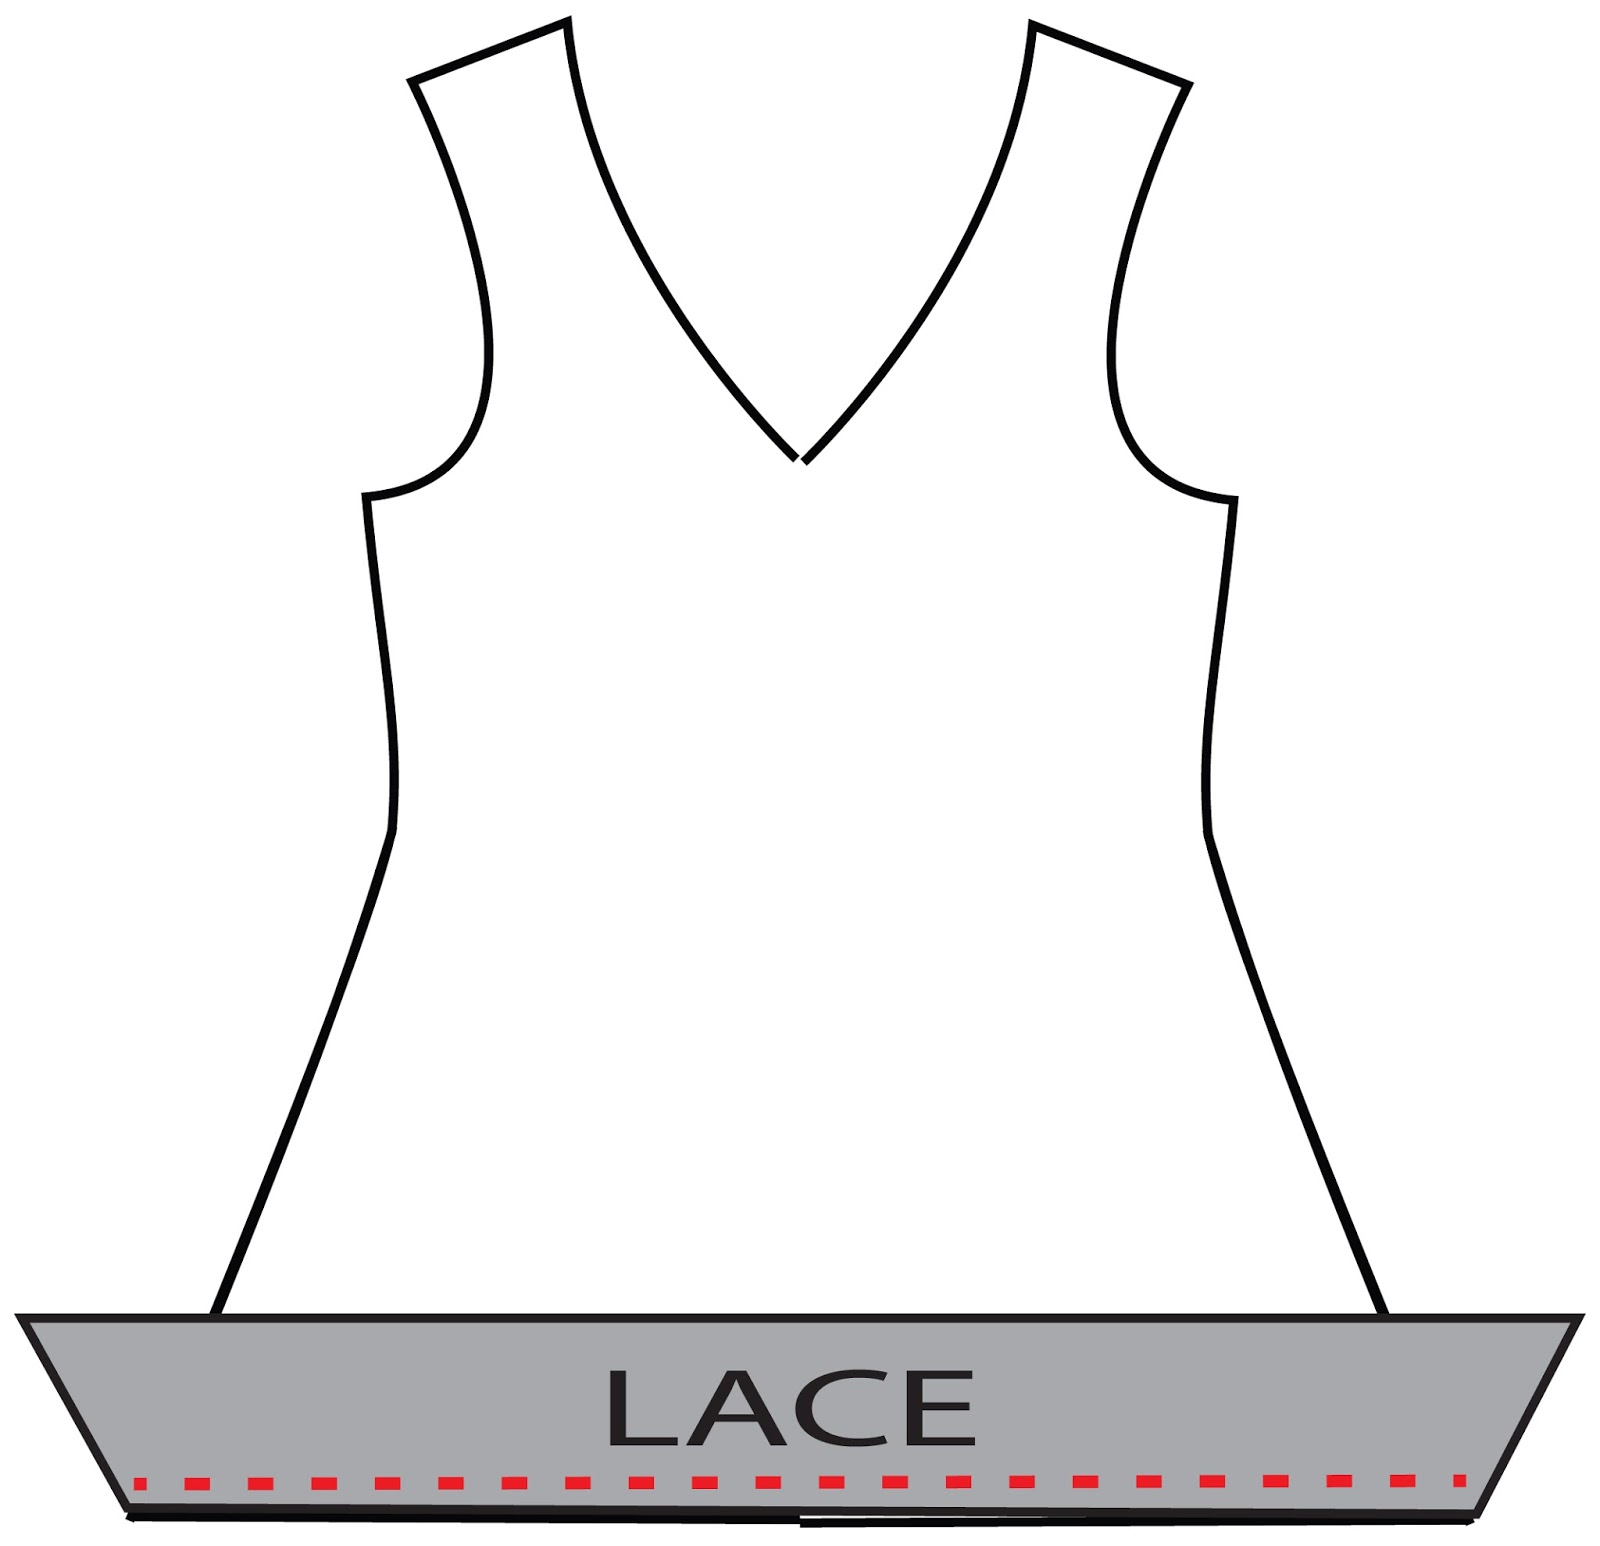 |
| step 4 |
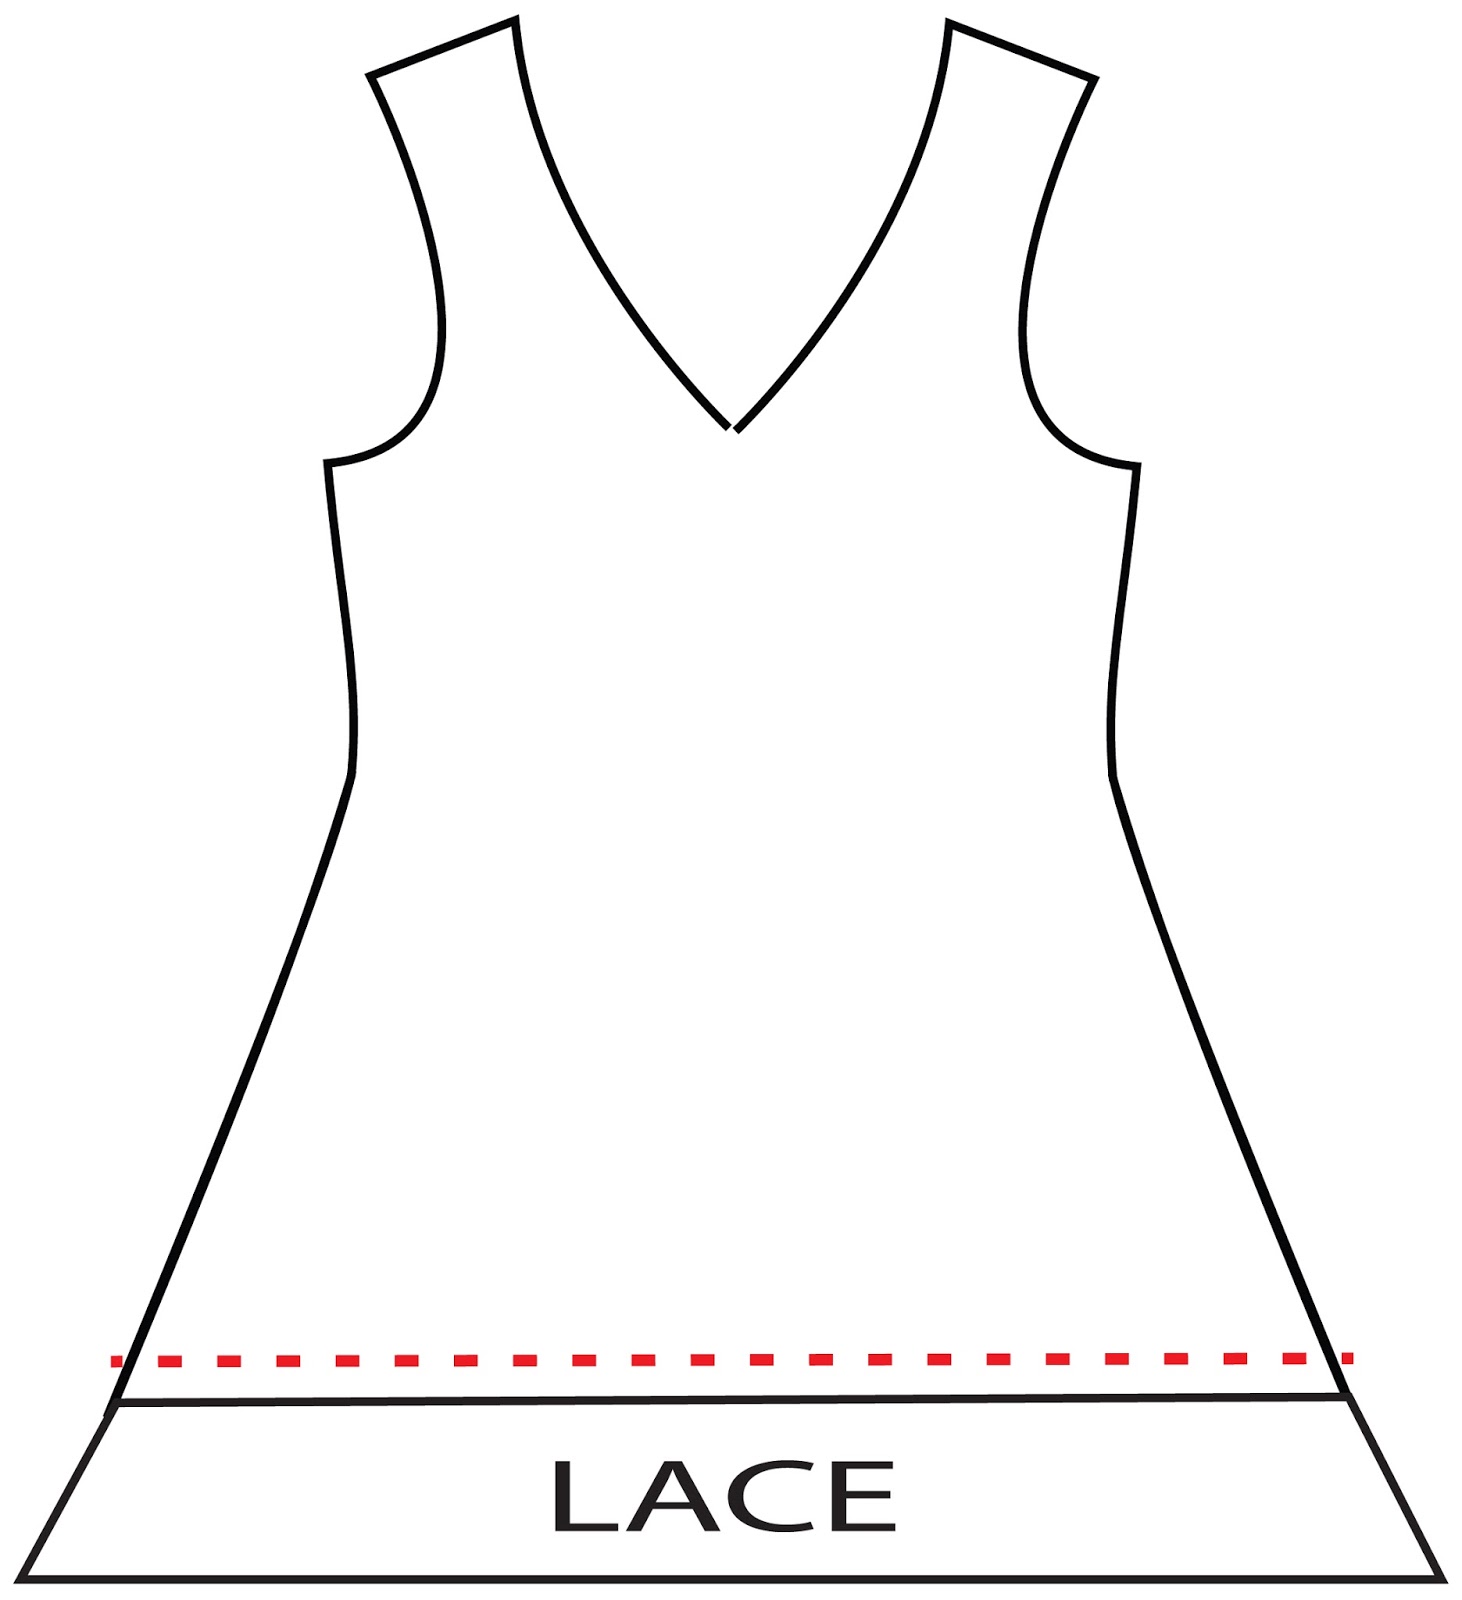 |
| step 6 |
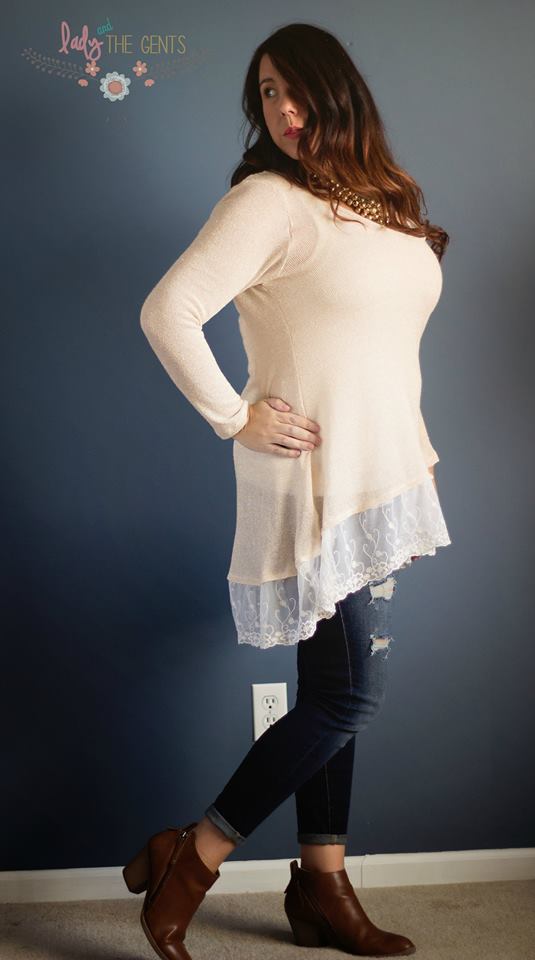
Check out what some of my amazing testers did with different lace trims on their Magnolias:


Don't forget to share your Magnolias on the Winter Wear Designs FB Page all week long for a chance to win!!!! #Magnoliasewandtell